Chicken Thighs: Easy Weeknight Dinner
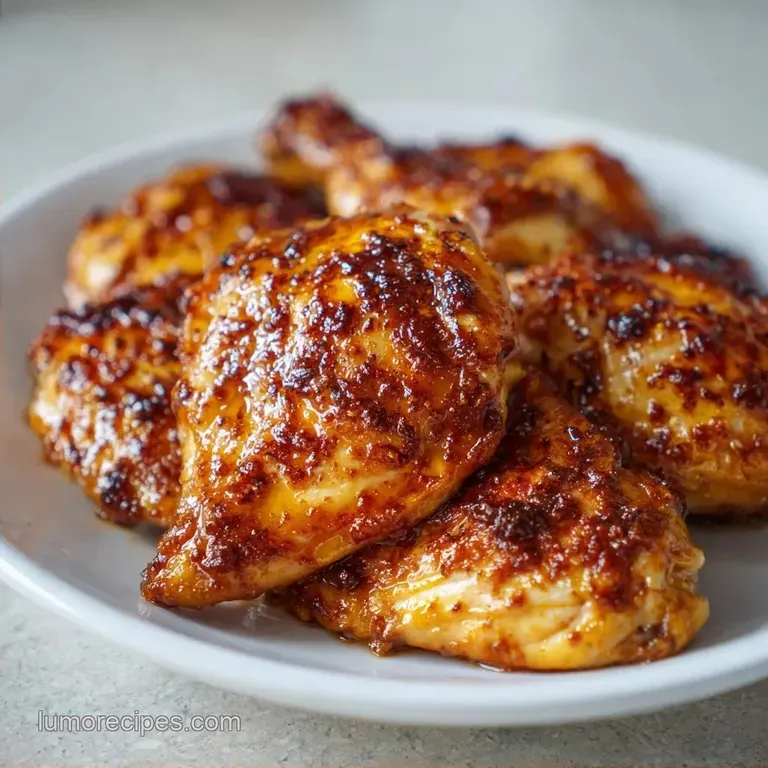
- Time: 10 min active + 30 min cook
- Flavor/Texture Hook: Deeply browned, crackling skin with buttery garlic notes
- Perfect for: Easy weeknight dinners or a small Sunday feast
- Perfect Crispy Chicken Thighs
- The Basic Recipe Specs
- Essential Ingredients and Swaps
- Required Kitchen Tools
- How to Cook Them
- Fixing Common Thigh Issues
- Troubleshooting Common Issues
- Customizing Your Flavor
- Scaling Your Batch
- Common Kitchen Myths
- Storage and Waste Tips
- Best Side Dish Pairings
- Recipe FAQs
- 📝 Recipe Card
That sound of skin hitting a scorching hot cast iron pan is the best part of the whole process. It starts as a loud sizzle, then settles into a steady bubble as the fat renders out. I remember my grandmother always insisting that the thighs were the only part of the bird worth eating, and she was right.
In a lot of homes, we were taught to prize the breast for being lean, but the thighs are where the real flavor lives.
This approach isn't about being fancy, it's about using the right heat at the right time. You'll start with a hard sear to get that golden crust, then let the oven do the heavy lifting. This means you aren't standing over the stove for thirty minutes, worrying if the middle is still raw while the outside burns.
You can expect a meal that feels like it took hours but actually fits into a busy Tuesday. We are focusing on minimal tools and reliable steps. If you have a skillet and an oven, you're already halfway there.
Perfect Crispy Chicken Thighs
Most people struggle with rubbery skin because they crowd the pan or start with wet meat. If the chicken is damp, it steams instead of searing. I've seen too many recipes tell you to just throw them in, but that's how you end up with grey, flabby skin.
Dry Skin: Removing surface moisture allows the oil to fry the skin directly, creating a crisp layer. Steady Heat: Moving from the stove to the oven prevents the outside from overcooking before the bone in center hits 165°F.
The goal is to render the fat slowly enough that the skin becomes a thin, crispy shell. When you press the meat down for those first 30 seconds, you're ensuring every millimeter of skin makes contact with the heat.
| Method | Time | Texture | Best For |
|---|---|---|---|
| Stovetop Only | 25 mins | Uneven / Crispy | Very fast meals |
| Sear & Oven | 40 mins | Uniform / Crackling | Reliable dinner |
The Basic Recipe Specs
Getting the timing right is everything. Since we are using bone in pieces, they take longer to reach a safe temperature than boneless versions. Don't rush the sear, or you'll lose that deep brown color.
For those who prefer a different approach, my Air Fryer Chicken Thighs are a great alternative for smaller batches. However, the cast iron method provides a richer, butter basted finish that is hard to beat.
Essential Ingredients and Swaps
I use avocado oil because it handles high heat without smoking. If you use extra virgin olive oil, it might burn before the skin is actually done.
| Ingredient | What It Does | Best Swap |
|---|---|---|
| Avocado Oil | over High heat searing | Grapeseed oil (similar smoke point) |
| Smoked Paprika | Adds earthiness/color | Garlic powder (milder, less color) |
| Unsalted Butter | Basting for flavor | Ghee (higher heat, nutty taste) |
| Fresh Thyme | Woodsy aroma | Dried thyme (use 1/3 the amount) |
The Full List:
- 2 lbs bone in, skin on chicken thighsWhy this? Bone in keeps the meat juicy during roasting
- 1 tbsp avocado oilWhy this? High smoke point prevents burnt oil
- 1 tsp kosher salt
- 1/2 tsp black pepper
- 1 tsp smoked paprikaWhy this? Gives a rich, reddish brown hue
- 3 tbsp unsalted butter
- 4 cloves garlic, smashed
- 3 sprigs fresh thyme
Required Kitchen Tools
You don't need a professional kitchen for this, just a few basics. A cast iron skillet is the gold standard here because it holds heat better than any other pan. If you don't have one, a stainless steel skillet works, but avoid non stick if you can.
Non stick pans often can't handle the 400°F oven temperature safely.
I also recommend a meat thermometer. It's the only way to know for sure that the meat is cooked through without cutting into it and letting all the juices run out.
How to Cook Them
Follow these steps closely to ensure the skin doesn't peel away from the meat.
- Pat the chicken thighs bone dry using paper towels. Note: This is the most important step for crispiness
- Rub avocado oil over the skin, then season evenly with kosher salt, black pepper, and smoked paprika.
- Heat a cast iron skillet over medium high heat until the oil shimmers.
- Place chicken thighs skin side down, pressing firmly for 30 seconds.
- Sear for 5-7 minutes without moving the meat until the skin is deep golden brown and releases easily.
- Flip the thighs and immediately transfer the skillet to a preheated oven at 400°F (200°C).
- During the final 5 minutes of roasting, add butter, smashed garlic, and thyme to the pan.
- Spoon the foaming butter over the chicken skin repeatedly.
- Remove the chicken from the oven when the internal temperature reaches 165°F (74°C).
Fixing Common Thigh Issues

When the skin isn't crisping, it's usually a temperature or moisture issue. If the pan isn't hot enough, the chicken sticks and the fat doesn't render. You'll know the pan is ready when a drop of water dances and evaporates instantly.
Another common issue is the garlic burning. Since we add the garlic and butter at the very end, they only spend a few minutes in the heat, which keeps them fragrant rather than bitter. For more on safe temperatures, the USDA Food Safety guidelines suggest 165°F as the standard for poultry.
Troubleshooting Common Issues
| Issue | Solution |
|---|---|
| Why is the skin rubbery | This happens when the chicken is crowded in the pan. If the thighs are touching, they trap steam between them. Leave at least an inch of space between each piece. |
| Why is the meat dry | Overcooking is the culprit. Even though thighs are forgiving, taking them past 175°F starts to degrade the texture. Use a thermometer to pull them at 165°F. |
| Why is the garlic burning | Adding garlic too early in the searing phase will burn it. Always add your aromatics during the final oven baste. |
Customizing Your Flavor
Once you have the technique down, you can change the spices. For a zesty version, add lemon zest and dried oregano to the oil rub. If you want something a bit sweeter, a teaspoon of brown sugar in the rub creates a gorgeous caramelized crust, though you have to watch it closely so it doesn't burn.
If you're feeding a crowd and want to simplify, try Chicken Thighs with Veggies recipe. It uses similar principles but removes the stovetop step.
Decision Shortcut:
- If you want maximum crunch → stick to the cast iron sear.
- If you want a hands off meal → use the sheet pan method.
- If you are short on time → use boneless thighs and skip the oven.
Scaling Your Batch
When you're doubling this recipe for a family gathering, don't try to fit 8 thighs in one 12 inch skillet. You'll crowd the pan and end up with steamed meat. Work in batches for the sear, then move them all to a larger roasting pan for the oven finish.
If you're just making two thighs, reduce the butter to 2 tablespoons. The cooking time in the oven will remain roughly the same, but keep an eye on the internal temp around the 20 minute mark.
| Scale | Pan Adjustment | Time Change | Ingredient Note |
|---|---|---|---|
| Half (2 thighs) | Small skillet | Same oven time | Reduce butter by 1 tbsp |
| Double (4 lbs) | 2 skillets / Large pan | Extend oven 5-10 mins | Use 1.5x the paprika |
Common Kitchen Myths
A lot of people think you need to "seal in the juices" by searing meat first. In reality, searing doesn't create a waterproof seal. It just adds flavor and color to the surface. The juiciness comes from not overcooking the meat.
Another myth is that you must let the meat "rest" for 20 minutes. While resting is great for large roasts, Chicken Thighs only need about 5 minutes. If you wait too long, the skin starts to soften as the meat releases moisture.
Storage and Waste Tips
Store leftovers in an airtight container in the fridge for up to 4 days. To reheat without losing the crunch, avoid the microwave. Instead, put them in a 350°F oven or a toaster oven for 10 minutes. This crisps the skin back up while warming the center.
You can freeze cooked thighs for up to 3 months, but the skin won't be as crisp after thawing. For the best results, freeze them in a vacuum sealed bag to prevent freezer burn.
Don't throw away the bones or the pan drippings. The brown bits (fond) left in the skillet are liquid gold. Pour in a splash of white wine or chicken broth, scrape the bottom, and you have a quick pan sauce. Save the bones in a freezer bag to make a homemade stock later.
Best Side Dish Pairings
These have a rich, buttery profile, so they pair well with something acidic or fresh to cut through the fat. A simple arugula salad with lemon vinaigrette is my go to. The peppery greens balance the smoked paprika perfectly.
For a heartier meal, roasted root vegetables or a pile of garlicky mashed potatoes work wonders. The pan butter from the chicken is excellent poured over steamed green beans or roasted carrots. If you want something light, a quick cucumber salad with rice vinegar and sesame seeds provides a refreshing contrast.
Recipe FAQs
How to cook chicken thighs in a pan?
Sear skin side down over medium high heat. Press firmly for 30 seconds and cook for 5-7 minutes until deep golden brown before flipping and finishing in the oven.
Are chicken thighs a good choice for diabetics?
Yes, they are an excellent protein source. They provide satiety without spiking blood sugar, especially when seasoned with salt, pepper, and paprika instead of sugary glazes.
What can I do with chicken thighs quickly and easy?
Use an air fryer for faster results. If you want a quicker alternative to the oven, try crispy air fryer methods to cut down on prep and wait time.
Is it true that chicken thighs always become dry if overcooked?
No, this is a common misconception. Thighs are much more forgiving than breasts, though taking them past 175°F will eventually degrade the texture.
How to prevent the skin from becoming rubbery?
Leave at least an inch of space between each piece. Crowding the pan traps steam between the thighs, which prevents the skin from crisping.
How to ensure the garlic doesn't burn in the pan?
Add smashed garlic during the final oven baste. Adding aromatics during the initial searing phase will cause them to burn before the meat is fully cooked.
How to reheat cooked thighs while keeping the skin crunchy?
Place them in a 350°F oven or toaster oven for 10 minutes. Avoid the microwave, as it steams the meat and makes the skin soft.
Crispy Garlic Chicken Thighs