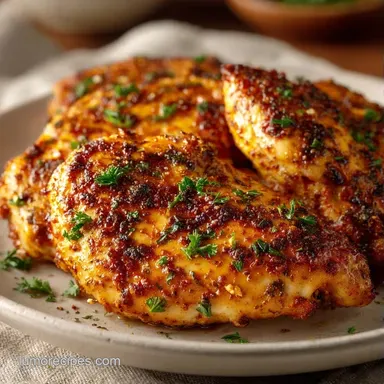
Skillet Chicken Thighs: Golden-Crust and Juicy
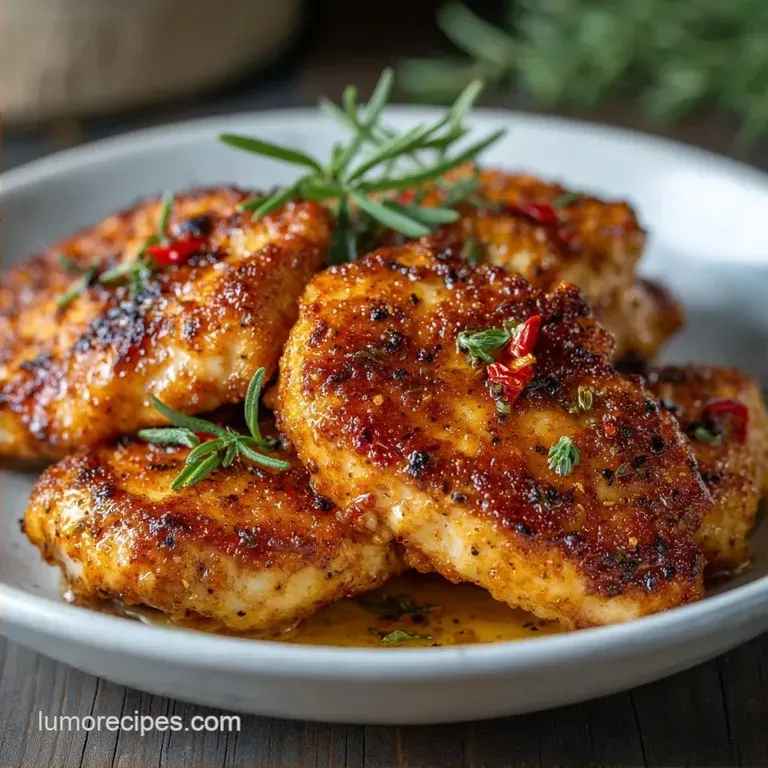
- Time: 5 min active + 15 min cook
- Flavor/Texture Hook: Mahogany crust with a velvety lemon butter finish
- Perfect for: Busy weeknight dinners or budget-friendly hosting
- Skillet Chicken Thighs: The Searing Secret
- Common Searing Mistakes to Avoid
- The Role of Each Ingredient
- Best Tools for the Job
- Step by Step to Mahogany Crust
- Troubleshooting Your Pan Fry
- Ways to Change the Flavor
- Adjusting the Batch Size
- Honest Truths About Searing
- Storage and Leftover Tips
- What to Pair with Your Meal
- Recipe FAQs
- 📝 Recipe Card
That loud, aggressive sizzle is the sound of a dinner win. I remember the first time I tried making this; I just tossed the meat in the pan and wondered why it looked gray and boiled instead of brown. I had completely skipped the drying step, and the chicken just sat there steaming in its own juices.
It was a soggy mess that tasted fine but looked depressing.
Once I learned to treat the surface of the meat like a science project, everything changed. I stopped rushing the sear and started letting the pan do the work. Now, I make these whenever I have a random Tuesday and only twenty minutes to get food on the table.
You can expect a meal that feels fancy but uses basic pantry staples. These Skillet Chicken Thighs are forgiving, juicy, and way cheaper than ordering takeout. We're going for a specific look here: a dark, golden brown exterior and a center that stays tender.
Skillet Chicken Thighs: The Searing Secret
Searing isn't just about color, it's about building a layer of flavor that you can't get from an oven. When you use a skillet, you're concentrating the heat directly against the protein. This creates that savory, salty crust that makes the dish feel complete.
The magic happens when the meat hits the oil and the water evaporates instantly. If you crowd the pan, the temperature drops and you lose that sizzle. I always make sure there's a good inch of space between each piece.
It might take an extra minute, but the result is a shatter crisp exterior that holds up against the pan sauce.
Working with Boneless Chicken Thighs is the smart move for a budget. They're more affordable than breasts and almost impossible to overcook. Even if you leave them in for an extra minute, the fat content keeps them from turning into rubber. It's the most reliable protein for a quick win.
Common Searing Mistakes to Avoid
Most people think they need to flip the meat every few minutes to "check" it. That's the fastest way to ruin your crust. Every time you lift the chicken, you break the contact with the heat and slow down the browning process. Trust the timer and leave it alone for the first six minutes.
Another common slip up is using the wrong oil. Extra virgin olive oil has a low smoke point, meaning it will burn and taste bitter before the chicken even browns. I use avocado oil because it can handle the high heat without breaking down. It stays neutral and lets the smoked paprika and garlic shine.
Then there's the "cold pan" mistake. If you put the chicken in before the oil is shimmering, the meat will stick to the metal. You'll end up tearing the crust off when you try to flip it. Wait for that first wisp of smoke to appear before the meat touches the surface.
Stovetop vs Oven Comparison
| Method | Time | Texture | Best For |
|---|---|---|---|
| Stovetop | 15 minutes | Deep crust, velvety sauce | Fast weeknights |
| Oven | 35 minutes | Even cook, softer skin | Hands off batches |
The Role of Each Ingredient
Understanding why we use certain items helps you make better swaps. For example, using bone broth instead of water for the sauce adds a layer of richness that makes the dish feel more expensive than it actually is.
Component Analysis
| Ingredient | Science Role | Pro Secret |
|---|---|---|
| Boneless Chicken Thighs | Fat rich protein | Always pat dry with paper towels |
| Avocado Oil | over High heat conductor | Look for the "shimmer" before adding meat |
| Bone Broth | Deglazing agent | Scrape the brown bits (fond) for maximum flavor |
| Fresh Lemon Juice | Acid balance | Add at the very end to keep the brightness |
Best Tools for the Job
You don't need a professional kitchen, but the pan matters. A cast iron skillet is my go to because it holds heat like a beast. Even when the cold meat hits the surface, the cast iron doesn't drop in temperature as much as stainless steel or non stick would.
If you don't have cast iron, a heavy bottomed stainless steel pan works well. Avoid non stick for this specific recipe. Non stick pans can't handle the high heat needed for a mahogany crust, and they often release chemicals if they get too hot.
A stainless pan also allows you to build a "fond" (those brown bits on the bottom), which is what makes the pan sauce so flavorful.
For flipping, use metal tongs. They give you a better grip and let you place the chicken precisely. I also recommend a digital meat thermometer. It's the only way to be 100% sure the chicken is safe to eat without cutting into it and letting all the juices run out.
Step by step to Mahogany Crust
Right then, let's get into the actual cooking. This process is fast, but the order of operations is everything.
- Pat the 2 lbs boneless skinless chicken thighs aggressively dry with paper towels. Note: Excess moisture creates steam, which prevents browning.
- Mix 1 tsp sea salt, 1/2 tsp black pepper, 1 tsp smoked paprika, and 1/2 tsp garlic powder in a bowl. Coat both sides of the chicken, pressing the spices in with your fingers.
- Heat 1 tbsp avocado oil in a cast iron skillet over medium high heat. Wait until the oil shimmers and barely begins to smoke.
- Place the chicken in the pan, leaving space between each piece. Sear undisturbed for 5–7 minutes until a deep golden brown crust forms.
- Flip the pieces. Cook for another 5–7 minutes until the internal temperature hits 160°F (71°C).
- Lower the heat to medium. Add 1 tbsp unsalted butter and 2 cloves of minced garlic. Swirl the pan to baste the chicken for 60 seconds.
- Move the chicken to a plate to rest. Pour 1/4 cup low sodium chicken bone broth and 1 tbsp fresh lemon juice into the hot pan.
- Scrape the bottom of the pan with a spoon to mix the brown bits into the sauce. Garnish with 1 tsp chopped fresh parsley and serve.
Chef's Note: Don't skip the resting period. Giving the meat 5 minutes off the heat allows the juices to redistribute, ensuring every bite is velvety and moist.
Troubleshooting Your Pan Fry
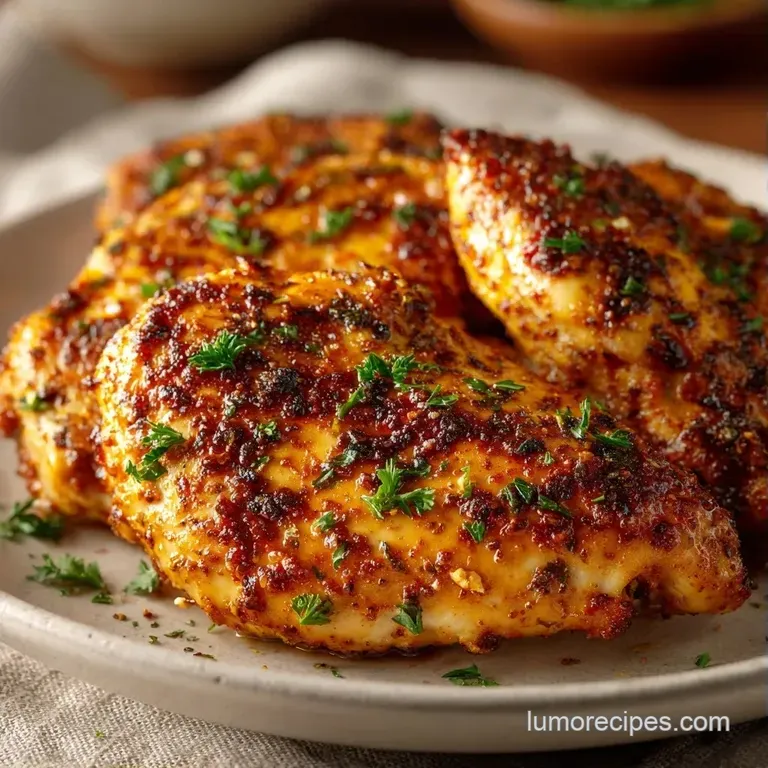
Even with a plan, things happen. Maybe the pan was too hot, or the chicken was too thick. Most of these issues are easy to fix if you know what caused them.
Why Your Meat Sticks
If the chicken clings to the pan, you likely flipped it too early. Meat naturally releases from the pan once the crust has fully formed. If it's sticking, give it another minute of heat.
Fixing the "Rubber" Texture
Rubberiness usually comes from overcooking or using breasts instead of thighs. Thighs are much more forgiving, but if you overdo it, you can save the dish by adding an extra splash of bone broth to the sauce to add moisture back.
Stopping the Smoke Show
If your kitchen looks like a fog machine, your oil is too hot. Lower the heat immediately and add a small knob of butter to stabilize the temperature.
Quick Fix Guide
| Problem | Root Cause | Solution |
|---|---|---|
| Gray meat | Pan not hot enough | Increase heat to med high |
| Burnt spices | Heat too high | Lower temp and use more oil |
| Dry center | Overcooked | Rest meat and add pan sauce |
Common Mistakes Checklist
- ✓ Patting chicken dry with paper towels
- ✓ Using high smoke point oil (avocado/grapeseed)
- ✓ Leaving meat undisturbed for 5-7 minutes
- ✓ Checking internal temp (160°F) rather than just color
- ✓ Deglazing the pan to capture the flavor
Ways to Change the Flavor
One of the reasons I love Skillet Chicken Thighs is how easy they are to tweak. The base of salt, pepper, and paprika is a great start, but you can move in different directions depending on what's in your fridge.
If you want something sweeter, you can swap the paprika for a bit of brown sugar and honey. This creates a sticky glaze that kids usually love. For a more "dinner party" feel, try swapping the garlic powder for fresh thyme and rosemary.
If you're looking for another one pan win, my Garlic Chicken for 4 recipe uses a similar searing technique but with a bolder, sweeter profile. You can also experiment with the acid; swap the lemon juice for a splash of apple cider vinegar or white wine for a tangier, more European flavor.
Ingredient Substitutions
| Original Ingredient | Substitute | Why It Works |
|---|---|---|
| Avocado Oil | Grapeseed Oil | Similar high smoke point. Note: Neutral flavor |
| Bone Broth | Chicken Stock | Similar flavor profile. Note: Slightly less body/richness |
| Unsalted Butter | Ghee | Higher smoke point. Note: Nuttier taste, dairy-free |
| Smoked Paprika | Cumin + Chili Powder | Earthy, smoky vibe. Note: Changes the flavor profile to "Taco" style |
Adjusting the Batch Size
When you're cooking for a crowd, you can't just double everything and throw it in one pan. If you do, you'll end up with a giant pile of steamed chicken instead of seared meat.
Cooking for Two (Half Batch) Use a smaller 10 inch skillet. You can reduce the cooking time by about 20% since there's less mass in the pan, but still rely on that 160°F internal temperature. Use half an egg if a recipe calls for a binder, but here, just halve the spices.
Cooking for a Crowd (2x-4x Batch) Work in batches. Sear 3-4 thighs at a time, move them to a baking sheet, and then start the next set. Once all are seared, you can put them all back in the pan (or a low oven at 200°F) to finish.
Only increase salt and spices to 1.5x, as they can become overpowering in large quantities.
Honest Truths About Searing
There are a few things people tell you about cooking meat that just aren't true. Let's clear some of that up so you don't waste time on useless techniques.
First, searing does not "seal in the juices." This is a huge myth. Moisture loss happens regardless of whether you sear the meat or not. The reason we sear is for the flavor and the texture. That crust is where all the magic is.
Second, you don't need to "room temperature" your meat for an hour. While some chefs swear by it, it's mostly overkill for boneless thighs. As long as you pat them dry and your pan is hot, the meat will cook through perfectly fine starting from the fridge.
Storage and Leftover Tips
These Skillet Chicken Thighs keep surprisingly well. Store them in an airtight container in the fridge for up to 4 days. To reheat, I avoid the microwave if possible, as it makes the meat rubbery. Instead, put them back in a skillet over medium heat with a tiny splash of water or broth.
Cover the pan for 2 minutes to steam them back to life.
For the freezer, you can freeze the cooked chicken for up to 3 months. I recommend freezing them without the pan sauce, as the lemon juice can change flavor over time. Just thaw overnight in the fridge and reheat in a pan.
To avoid waste, save any leftover bone broth or the pan drippings. If you have a few thighs left over, shred them and toss them into a salad or a wrap the next day. If you have the bones from a whole chicken, you can use them to make your own bone broth for the next time you make this recipe.
What to Pair with Your Meal
Since the chicken is rich and savory, you want sides that offer a bit of contrast. A bright, crisp green salad with a vinaigrette cuts through the butter and fat perfectly. If you want something more comforting, these pair beautifully with some Creamy Scalloped Potatoes to soak up that extra pan sauce.
For a lighter option, roasted asparagus or sautéed spinach works well. Just toss them in the same pan after the chicken is done to pick up those leftover brown bits. It saves on dishes and adds a hit of nutrition to the plate.
If you're feeling fancy, serve the chicken over a bed of cauliflower purée or a simple quinoa pilaf. The key is to keep the side dishes simple so the mahogany crust of the chicken remains the star of the show.
Recipe FAQs
How long does it take to cook boneless chicken thighs in a skillet?
Cook for 10 14 minutes total. Sear the meat for 5 7 minutes per side until the internal temperature reaches 160°F (71°C).
How to cook chicken thighs in a pan?
Sear in a cast iron skillet over medium high heat. Pat the meat dry, season with the spice blend, and cook 5 7 minutes per side before basting with butter and garlic.
Are chicken thighs a good choice for diabetics?
Yes, they are a great option. Thighs provide high-quality protein and fats without the added sugars or refined carbohydrates found in many processed meats.
Is it true that chicken thighs are bad for LDL cholesterol?
No, this is a common misconception. While thighs contain more fat than breasts, they provide essential fats that are not inherently harmful to LDL levels when eaten in moderation.
How to cook chicken for diabetic patients?
Season with dry spices rather than sugary glazes. Use a combination of smoked paprika, garlic powder, and sea salt to add deep flavor without impacting blood glucose levels.
What are some other great ways to prepare boneless chicken thighs?
Try different heat sources for various textures. If you enjoyed the searing process here, see how the same principle works in our crispy roasted version.
How to reheat leftover skillet chicken thighs?
Reheat in a skillet over medium heat. Add a tiny splash of chicken bone broth and cover for 2 minutes to steam them back to life without making the meat rubbery.
Skillet Chicken Thighs