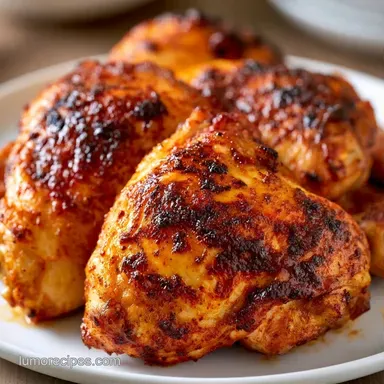
Simple Roasted Chicken Thighs: Crispy and Juicy
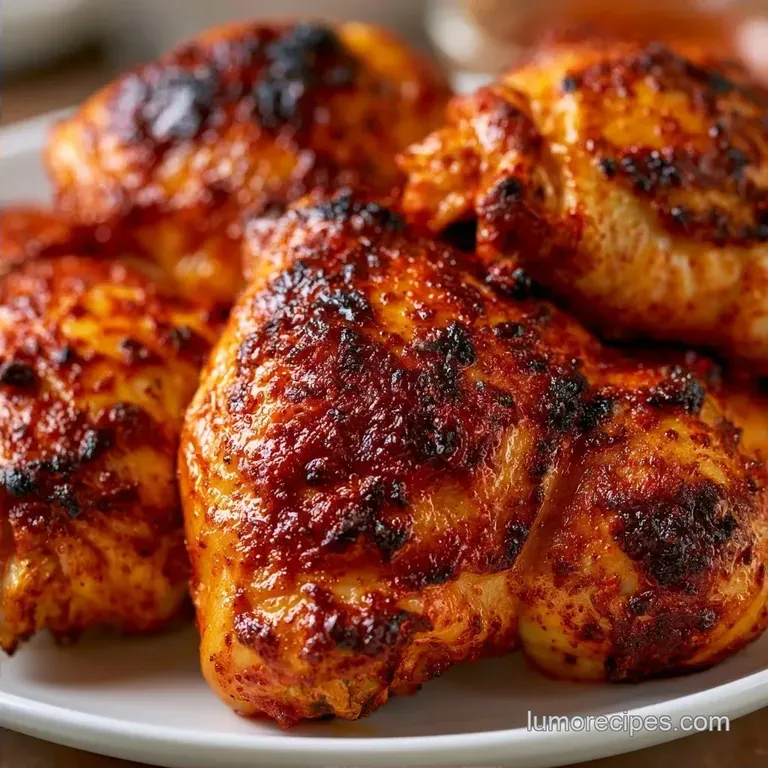
- Time:10 minutes active + 35 minutes roasting = Total 55 minutes
- Flavor/Texture Hook: Shattering skin with a smoky, savory rub
- Perfect for: Busy weeknights, beginner cooks, and meal prep
- Simple Roasted Chicken Thighs
- The Secret to Shattering Skin
- Quick Recipe Specs
- Gathering Your Pantry Essentials
- Necessary Kitchen Tools
- The Step-by-Step Process
- Solving Common Cooking Issues
- Troubleshooting Common Issues
- Customizing Your Roast
- Adjusting Your Batch Size
- Dispelling Common Myths
- Storage and Zero Waste
- Serving and Presentation
- Recipe FAQs
- 📝 Recipe Card
The first thing you'll notice is that sizzle. You know the one, where the fat hits the hot pan and the smell of smoked paprika starts to fill the kitchen, making everyone in the house suddenly very interested in dinner. It's a scent that feels like a warm hug, but with a bit of a spicy edge.
I remember the first time I tried making these. I was in a rush, so I just threw the thighs on the tray, rubbed some oil on them, and slid them into the oven. The result? Rubbery, pale skin that felt more like a wet napkin than a roast. It was a total letdown.
I realized then that the secret isn't in the spices, but in the moisture. Once I started treating the skin like a precision project, everything changed.
Now, these Simple Roasted Chicken Thighs are my go to when I have zero mental energy left but still want something that feels like a real meal. We're talking about meat that pulls away from the bone with zero effort and skin that actually cracks when you bite into it.
It's a quick win that makes you look like you spent hours in the kitchen, even though you were probably just scrolling on your phone while the oven did the heavy lifting.
Simple Roasted Chicken Thighs
The beauty of this dish is that it doesn't ask much from you. You don't need a fancy kitchen or a degree in culinary arts to get it right. All you need is a bit of patience during the "dry phase" and a hot oven.
If you've ever struggled with chicken that comes out steamed instead of roasted, this is the fix you've been looking for.
I've found that using bone in thighs is the only way to go here. Boneless thighs are fine for stir fries, but for a roast, the bone acts as a natural insulator. It keeps the center juicy while the outside gets that deep, golden brown color we're after.
Plus, the extra fat from the skin creates its own roasting oil, which essentially fries the chicken from the bottom up.
Right then, let's get into the nitty gritty. We're focusing on a plan based execution: a quick prep flow, a hands off cooking flow, and a resting finish. This ensures you aren't scrambling at the last minute and your meat doesn't dry out.
The Secret to Shattering Skin
You might wonder why some chicken skin is like parchment paper and others feel like rubber. It all comes down to a few simple triggers. When we use high heat, we're essentially forcing the water out of the skin so the fat can take over.
Surface Dryness: Water is the enemy of crispiness. If the skin is damp, the oven spends the first 20 minutes evaporating that water instead of browning the skin.
Fat Rendering: High heat melts the subcutaneous fat. This oil then coats the skin, creating a frying effect right on the bird.
Spice Adhesion: Oil acts as the glue. By mixing the spices into the oil first, we create a paste that sticks to every nook and cranny rather than just sliding off.
Heat Circulation: Leaving space between the thighs allows hot air to wrap around the meat. If they're crowded, they steam each other, and you lose that shatter.
| Method | Time | Texture | Best For |
|---|---|---|---|
| Baking Sheet | 35 mins | Evenly crisp | Large batches |
| Cast Iron | 35 mins | Extra sear on bottom | Small batches |
| Foil Wrap | 45 mins | Soft/Steamed | Slow heating |
| Wire Rack | 35 mins | 360 degree crisp | Maximum crunch |
This is where most people trip up. They think the oven temperature does all the work, but the preparation is what actually sets the stage. If you want to dive deeper into the physics of meat temperatures, Serious Eats has some great breakdowns on why internal temp is the only metric that actually matters.
Quick Recipe Specs
Before we grab the ingredients, let's look at the timeline. I like to treat my kitchen like a production line to save time.
- Prep Flow (10 minutes): This is the "active" part. It involves preheating the oven, patting the chicken dry, and mixing the rub.
- Cooking Flow (35 minutes): This is the "passive" part. The chicken is in the oven, and you're free to tidy up the kitchen or set the table.
- Finish Flow (10 minutes): This is the "patience" part. Letting the meat rest is non negotiable if you want those juices to stay inside.
Trust me on this: if you cut into the chicken the second it comes out of the oven, all that velvety juice will run across the board, leaving the meat dry. Just give it ten minutes.
Gathering Your Pantry Essentials
You don't need a massive spice rack for this. We're keeping it simple with a few staples that provide a balanced, savory profile. I always recommend using kosher salt over table salt because the larger grains are easier to distribute evenly without over salting.
Ingredient Breakdown
| Ingredient | Science Role | Pro Secret |
|---|---|---|
| Olive Oil | Heat Conductor | Helps the paprika not burn too quickly |
| Kosher Salt | Moisture Drawer | Pulls water from skin to help it crisp |
| Smoked Paprika | Color & Flavor | Gives a "grilled" taste without a grill |
| Garlic Powder | Savory Base | Doesn't burn as easily as fresh garlic |
Now, let's look at what's actually going into the bowl. Don't bother with low-fat oils here; you want something that can handle the 425°F heat without smoking.
- 2 lbs bone in, skin on chicken thighs Why this? Bone preserves moisture; skin provides the crunch
- 2 tbsp olive oil Why this? High smoke point and neutral flavor
- 1 tsp kosher salt Why this? Coarse grains for better control
- ½ tsp cracked black pepper Why this? Adds a subtle, sharp bite
- 1 tsp garlic powder Why this? Even coverage and savory depth
- 1 tsp smoked paprika Why this? Deep red color and wood smoke aroma
If you're missing something, don't panic. Most of these can be swapped without ruining the dish.
| Original Ingredient | Substitute | Why It Works |
|---|---|---|
| Olive Oil (2 tbsp) | Avocado Oil (2 tbsp) | Higher smoke point. Note: Very neutral flavor |
| Smoked Paprika (1 tsp) | Sweet Paprika (1 tsp) | Similar color. Note: Lacks the smoky depth |
| Garlic Powder (1 tsp) | Onion Powder (1 tsp) | Similar savory profile. Note: Slightly sweeter |
| Kosher Salt (1 tsp) | Table Salt (¾ tsp) | Same function. Note: Use less as it's saltier |
I've found that if you're craving a different vibe, you can easily pivot. For instance, if you're in the mood for something a bit more zesty, you can check out my Easy One Pan Lemon Garlic Chicken for a different take on the thigh.
Necessary Kitchen Tools
You don't need any fancy gadgets here. A basic setup will do just fine. I prefer a cast iron skillet because it holds heat so well, but a standard rimmed baking sheet is the easiest for cleanup.
- Baking Sheet or Cast Iron Skillet: The foundation of the roast.
- Parchment Paper: Only if using a baking sheet; it prevents the skin from sticking.
- Paper Towels: These are actually the most important tool in the recipe.
- Instant Read Thermometer: The only way to be 100% sure the chicken is done.
- Small Mixing Bowl: For the spice rub.
The step-by-step Process
Let's crack on. Follow these steps exactly, and you'll avoid the "rubbery skin" tragedy I mentioned earlier.
- Heat the Oven. Preheat your oven to 425°F (218°C). Line your baking sheet with parchment paper or get your cast iron skillet ready. Note: A hot oven is key for an immediate sear
- Dry the Skin. Use paper towels to pat every single inch of the chicken skin completely dry. until there is no visible moisture. Note: This is the most critical step for crispiness
- Mix the Rub. In a small bowl, whisk together the olive oil, salt, pepper, garlic powder, and paprika.
- Season the Meat. Rub the spice mixture generously over the chicken. Try to get some of the oil and spices under the skin where possible.
- Arrange the Thighs. Place the thighs skin side up on the pan. Leave about an inch of space between each piece. Note: Crowding causes steaming, not roasting
- Roast the Chicken. Bake for 30-35 minutes until the skin is deep golden brown and crackling.
- Check Temperature. Use your thermometer to ensure the thickest part of the thigh reaches 165°F (74°C).
- Rest the Meat. Transfer the chicken to a plate and let it rest for 5-10 minutes. Note: This redistributes the juices for a velvety texture
Solving Common Cooking Issues
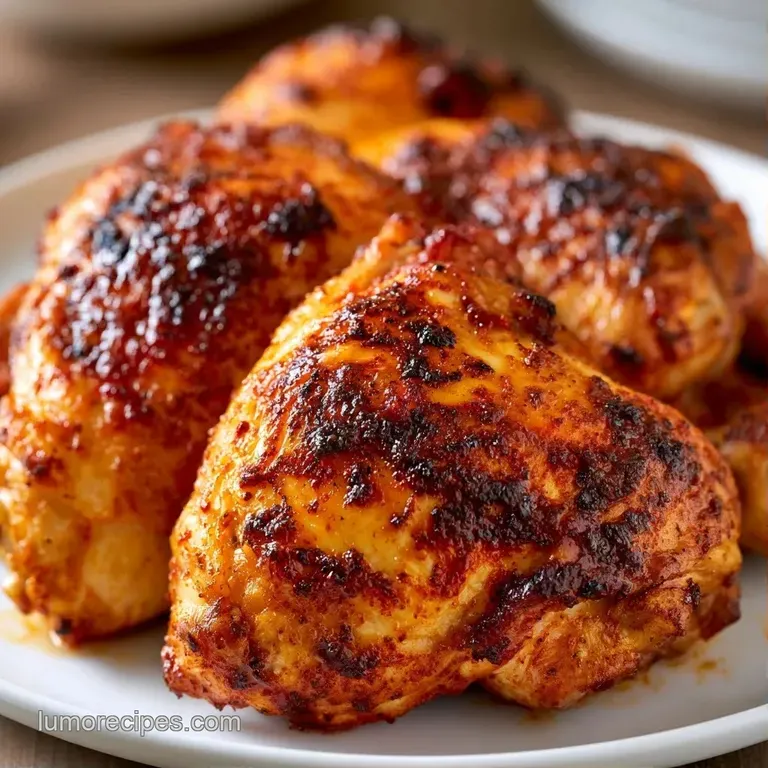
Even with a simple recipe, things can go sideways. Usually, it's a matter of temperature or moisture. If your skin isn't shattering, you likely skipped the paper towel step or crowded the pan.
Troubleshooting Common Issues
| Issue | Solution |
|---|---|
| Why Your Skin Is Rubbery | This usually happens when the oven temperature is too low or the chicken was too wet. When water remains on the skin, it turns into steam, which prevents the fat from frying the skin. |
| Why Your Rub Is Burnt | If your spices look black instead of deep red, your oven might be running too hot, or you used too much oil. Smoked paprika can burn if the heat is extreme, but at 425°F, it should be fine. |
| Why the Center Is Raw | Chicken thighs vary in size. If the skin is brown but the center is pink, you might have a particularly thick thigh. Just put them back in for another 5 minutes. |
Common Mistakes Checklist
- ✓ Patting dry with paper towels (don't just "wipe" them)
- ✓ Leaving space between pieces on the tray
- ✓ Using a thermometer instead of guessing by color
- ✓ Resting the meat before slicing
- ✓ Preheating the oven fully before the chicken goes in
Customizing Your Roast
Once you've nailed the basic Simple Roasted Chicken Thighs, you can start playing with the flavors. The base of oil and salt is a canvas.
If you want a more "herby" feel, add a teaspoon of dried rosemary or thyme to the rub. For a bit of heat, a pinch of cayenne pepper or chipotle powder works wonders. I also love adding a squeeze of fresh lemon juice right after the chicken comes out of the oven; the acidity cuts through the richness of the fat.
If you're looking to turn this into a full meal, try roasting some chopped carrots and baby potatoes on the same tray. Just make sure to cut the vegetables small enough that they cook in the same 35 minute window as the chicken. The vegetables will roast in the chicken drippings, which is basically liquid gold.
Adjusting Your Batch Size
Cooking for two is different than cooking for a crowd. Here is how to scale this without losing the crunch.
Scaling Down (2 Thighs) Use a smaller pan or a small skillet. Reduce the roasting time by about 5 minutes, but always rely on the thermometer. Be careful not to over salt, as the ratio of surface area to meat changes.
Scaling Up (8-12 Thighs) Do not crowd a single pan. If you have to, use two separate baking sheets. If you crowd them, they will steam and you'll get that rubbery skin again. Keep the salt and spices to about 1.5x rather than 2x to avoid an overpowering taste.
If you're roasting a massive batch, you can lower the oven temp to 400°F (200°C) and extend the time by 10 minutes to ensure the middle pieces cook through without burning the outer ones.
Dispelling Common Myths
There's a lot of bad advice out there about roasting chicken. Let's clear a few things up.
Myth: Searing meat "locks in" the juices. This is simply not true. Searing creates flavor and color, but it doesn't create a waterproof seal. The juiciness comes from not overcooking the meat and letting it rest.
Myth: You must roast chicken at a low temperature for it to be tender. While "low and slow" works for brisket, chicken thighs are forgiving. High heat is actually better for thighs because it renders the skin quickly while the bone protects the interior.
Myth: You need to peel the skin for a "healthier" roast. If you're roasting, keep the skin on. It acts as a protective layer that prevents the meat from drying out. You can always remove it after cooking if you prefer.
Storage and Zero Waste
Don't let the leftovers go to waste. These thighs actually taste great the next day, provided you reheat them correctly.
Storage Guidelines Keep the cooked chicken in an airtight container in the fridge for up to 4 days. For the freezer, wrap them tightly in foil and then a freezer bag; they'll stay good for 3 months.
Reheating for Crunch Avoid the microwave if you can. It will turn the skin into rubber. Instead, pop them back in the oven at 350°F (175°C) for about 10 minutes. This helps bring back some of that shatter.
Zero Waste Tips Don't throw away the bones! Once you've eaten the meat, toss the bones into a pot with water, an onion, and a carrot. Simmer them for a few hours to make a rich, homemade bone broth. Also, the pan drippings can be whisked with a bit of flour and chicken stock to make a velvety gravy.
Serving and Presentation
When it comes to plating, I like to keep it rustic. Pile the chicken on a platter and pour those pan juices right over the top. It looks intentional and tastes better.
For a side dish, these go perfectly with something creamy to balance the salt and smoke. I highly recommend pairing them with my Jiffy Corn Casserole recipe for a cozy, comfort food vibe. If you want something lighter, a simple arugula salad with a lemon vinaigrette provides a bright contrast to the rich chicken.
To finish the plate, a sprinkle of fresh parsley or chopped chives adds a pop of color. Serve it with a wedge of lemon on the side, so guests can add a hit of acidity right before they eat.
Simple Roasted Chicken Thighs are all about the contrast between the crispy outside and the tender inside, so let the meat be the star of the show.
Recipe FAQs
How long do you cook baked chicken thighs?
Roast for 30 35 minutes. Use a meat thermometer to ensure the thickest part of the thigh reaches an internal temperature of 165°F (74°C).
Is it better to bake bone-in chicken thighs at 350 or 400?
Neither, 425°F is the best choice. Higher heat is necessary to render the fat quickly, which prevents the skin from becoming rubbery.
How to bake chicken thighs in the oven?
Preheat your oven to 425°F. Pat the skin dry, rub with the spice mixture, and roast skin side up on a baking sheet for 30 35 minutes.
What is the best way to cook skinless chicken thighs?
Reduce the cooking time slightly. Without the skin to insulate the meat, boneless or skinless thighs can dry out faster at high temperatures.
Are chicken thighs good for diabetics?
Yes, they are an excellent low-carb protein. Using a simple rub of olive oil and spices avoids the added sugars found in many bottled sauces.
Can I eat chicken thighs with IBS or gastritis?
Yes, provided you adjust the seasoning. Omit the garlic powder and smoked paprika if these specific spices trigger your symptoms, sticking to just salt and pepper.
What are some great side dishes for roasted chicken thighs?
Pair them with a starch or a crisp green. These thighs are a perfect match for cheesy smashed potatoes to create a hearty, balanced dinner.
Simple Roasted Chicken Thighs