Guilt-Free Crispy Baked Chicken Thighs: Shatter Crisp Skin
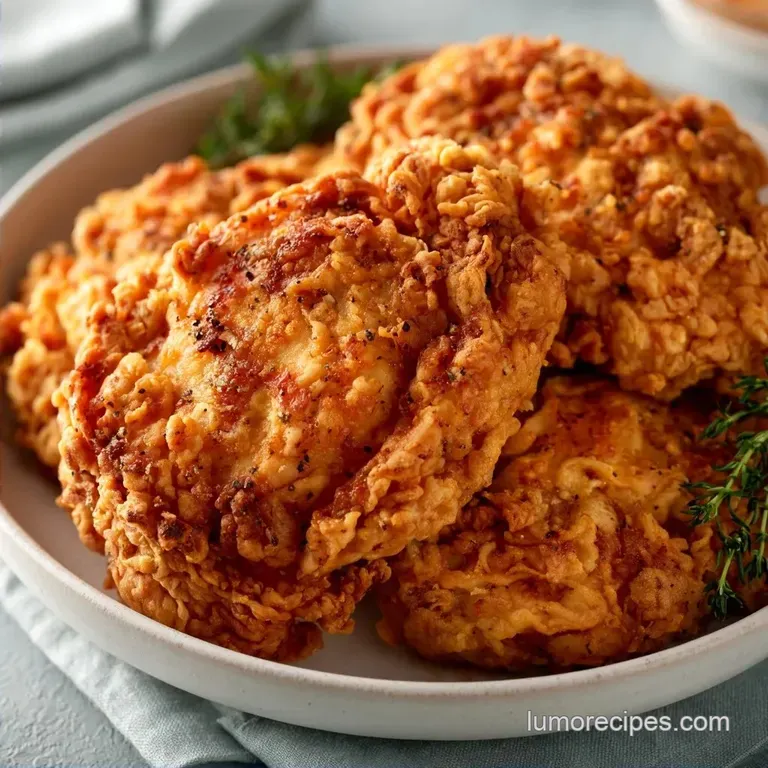
- Time: 10 min active + 35 min baking = Total 45 mins
- Flavor/Texture Hook: Shatter crisp skin with juicy, smoky meat
- Perfect for: Busy weeknight dinners or meal prep for the family
- Crispy Baked Chicken Thighs
- Why This Method Actually Works
- The Ingredient Deep Dive
- The Essential Ingredient List
- Tools You'll Need
- Step-by-Step Cooking Guide
- Fixing Common Skin Issues
- Troubleshooting Common Issues
- Easy Swaps and Variations
- Adjusting the Batch Size
- Kitchen Truths and Myths
- Storage and Leftover Tips
- Serving Your Chicken Right
- Recipe FAQs
- 📝 Recipe Card
Crispy Baked Chicken Thighs
Ever wondered why restaurant chicken has that thin, crackling skin while yours often ends up feeling like a damp sponge? I used to have this exact problem. I remember one Tuesday night where I tried to be "fancy" for my partner, but the chicken came out looking gray and feeling rubbery.
I actually remember the disappointment of poking the skin with a fork and it just... bent. No crunch. No sizzle. Just sad, wet poultry.
But then I started playing around with how moisture affects the skin. I realized that the enemy isn't the oven, it's the water. Once I started treating the skin like a science project, everything changed. Now, the sound of the skin shattering under a knife is my favorite part of the meal.
This recipe for Crispy Baked Chicken Thighs is the result of those "what happens if I do this" moments. We're using a few simple tricks to force the skin to crisp up and stay that way. You'll get that deep gold color and a texture that's almost like a potato chip, but with the juicy, tender meat we all love.
Why This Method Actually Works
Instead of just throwing meat in a pan, we're using a few specific tricks to change the texture of the skin.
- The Bubble Effect: Baking powder raises the pH level of the skin, which breaks down the proteins and creates tiny bubbles. These bubbles increase the surface area, giving you more "crunch zones" as the fat renders.
- Airflow Access: Using a wire rack means the hot air hits the bottom of the thighs, not just the top. This prevents the bottom from steaming in its own juices, which is usually why the underside stays mushy.
- Surface Dehydration: Patting the meat dry removes the surface water that would otherwise turn into steam. According to Serious Eats, removing surface moisture is the single most important step for achieving a brown, crispy crust.
- High Heat Blast: The 425°F temperature is high enough to render the subcutaneous fat quickly. This fries the skin from the inside out while keeping the interior meat from drying out.
| Method | Time | Texture | Best For |
|---|---|---|---|
| Stovetop | 25 mins | Heavy sear, uneven | Single portions |
| Oven | 45 mins | Evenly shatter crisp | Family meals |
| Air Fryer | 20 mins | Very dry crisp | Quick lunch |
The Ingredient Deep Dive
Before we get to the list, you need to understand why these specific items are here. This isn't just about flavor; it's about the physics of the crust.
| Ingredient | Science Role | Pro Secret |
|---|---|---|
| Baking Powder | pH Modifier | Use aluminum free to avoid a metallic aftertaste |
| Avocado Oil | Heat Conduit | High smoke point means it won't burn at 425°F |
| Smoked Paprika | Color & Depth | Adds a "grilled" vibe without the actual grill |
| Kosher Salt | Moisture Draw | Large grains draw water out of the skin more effectively |
The Essential Ingredient List
Right then, let's look at what you need. I've kept this accessible. Honestly, don't bother with low-fat substitutes here; the fat is what makes the skin work.
- 2 lbs bone in, skin on chicken thighs Why this? Bone in stays juicier during over high heat roasting
- 1 tbsp avocado oil Why this? It handles the high heat without smoking
- 1 tsp baking powder Why this? The secret to the "bubble" texture
- 1 tsp kosher salt Why this? Better distribution than table salt
- 1/2 tsp black pepper Why this? Basic heat and aroma
- 1 tsp garlic powder Why this? Even coating; fresh garlic burns at this temp
- 1 tsp smoked paprika Why this? For that deep, reddish gold color
Quick Substitutions:
| Original Ingredient | Substitute | Why It Works |
|---|---|---|
| Avocado Oil | Grapeseed Oil | Similar high smoke point. Note: Neutral flavor |
| Smoked Paprika | Sweet Paprika | Same color. Note: Lacks the smoky depth |
| Baking Powder | None | Still tastes great. Note: Skin will be less "bubbly" |
I've found that using a specific oil makes a difference. If you're leaning toward something like extra virgin olive oil, be careful. It has a lower smoke point and can start to smell acrid in a 425°F oven. Stick to the over high heat oils.
Tools You'll Need
You don't need a professional kitchen, but there are two things that are non negotiable here.
First, the wire cooling rack. If you put the chicken directly on a baking sheet, the bottom of the thigh sits in a pool of rendered fat and water. It essentially boils. The rack lets the heat circulate 360 degrees.
Second, a digital meat thermometer. I've seen too many people overcook their chicken until it's like cardboard because they "thought it looked done." Chicken thighs are forgiving, but there's a sweet spot.
Chef Note: If you don't have a wire rack, you can bunch up some aluminum foil into small balls and set the chicken on top of them. It's a bit hacky, but it works.
Step-by-step Cooking Guide
Let's crack on. Follow these steps exactly, and you'll get that shatter crisp skin every single time.
- Pat the chicken thighs extremely dry using paper towels. Note: This is the most important step; any moisture left will steam the skin
- Lightly coat the skin side of the chicken with avocado oil. Note: This helps the spices stick and aids in heat conduction
- In a small mixing bowl, combine the baking powder, kosher salt, black pepper, garlic powder, and smoked paprika.
- Sprinkle the seasoning mixture evenly over both sides of the chicken. Note: Use your fingers to press the spices firmly into the skin
- Place a wire cooling rack inside a large rimmed baking sheet.
- Arrange the thighs skin side up on the rack. Note: Leave an inch of space between them for airflow
- Bake at 425°F (218°C) for 30-35 minutes.
- Remove from oven until a meat thermometer reads 165°F (74°C) to 175°F (79°C) in the thickest part.
- Let the meat rest on the rack for 5 minutes before serving. Note: This lets the juices redistribute so they don't run out on the plate
Fixing Common Skin Issues
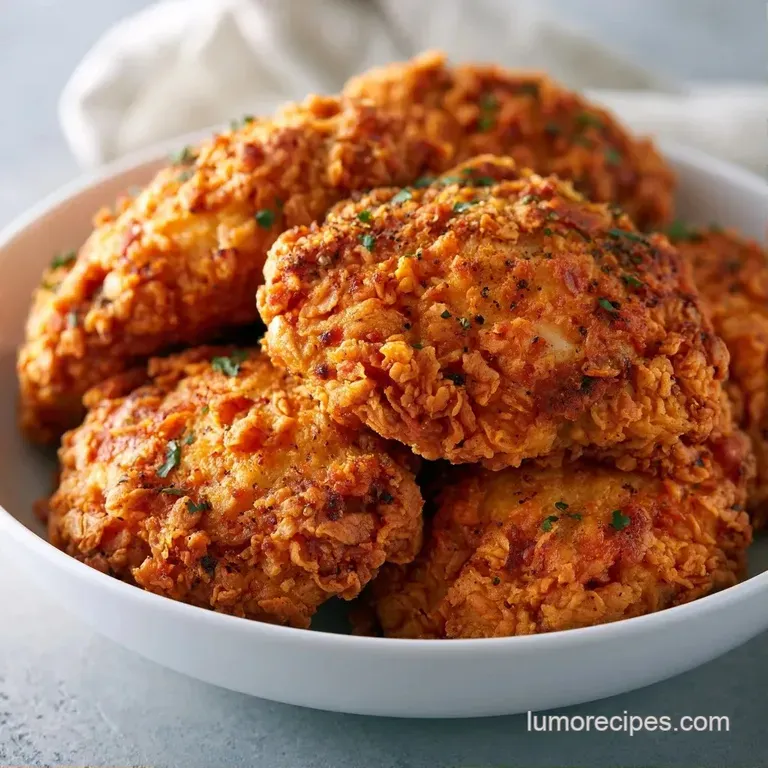
Even with a plan, things can go sideways. Most of the time, it's a moisture or temperature issue.
Troubleshooting Common Issues
| Issue | Solution |
|---|---|
| Why Your Skin Is Rubbery | This usually happens because the chicken was too wet when it went into the oven. If you skip the paper towel step, you're essentially steaming the meat. |
| Why Your Seasoning Burnt | If you see black spots on your paprika, your oven might be running hot or you used a rub with sugar in it. Smoked paprika can burn if the heat is too intense for too long. |
| Why The Meat Is Dry | Overcooking is the culprit here. While thighs are better at higher temps than breasts, going past 185°F will start to dry out the muscle fibers. Trust the thermometer over the timer. |
The Crunch Checklist:
- ✓ Skin patted bone dry with paper towels
- ✓ Baking powder included in the rub
- ✓ Wire rack used for airflow
- ✓ Oven preheated to full 425°F
- ✓ Internal temp checked with a probe
Easy Swaps and Variations
One of the best things about this Crispy Baked Chicken Thighs recipe is how well it plays with other flavors. Once you have the technique down, you can change the rub.
The Mediterranean Twist Swap the smoked paprika for dried oregano and a pinch of cinnamon. After roasting, squeeze some fresh lemon juice over the top. This pairs beautifully with my Classic Creamy Scalloped Potatoes for a hearty, comforting meal.
The Boneless Version If you're using Crispy Baked Chicken Thighs Boneless Skinless, you'll need to adjust. Since there's no bone to protect the meat and no skin to crisp, reduce the bake time to about 20-25 minutes.
I recommend dredging them in a bit of cornstarch instead of baking powder for a similar "crunch" effect.
The Low Sodium Option Use a potassium based salt substitute or increase the garlic and paprika to compensate for less salt. You can also add a tablespoon of apple cider vinegar to the rub to provide a "tang" that mimics the sharpness of salt.
If you're looking for something even lighter, you might try a Baked Tilapia for 4 recipe, which uses a similar oven roasting method but with a much faster cook time.
Adjusting the Batch Size
Whether you're cooking for one or a crowd, the physics of the oven stay the same, but the logistics change.
Cooking for Two (Downscaling) If you're only making 2-3 thighs, use a smaller baking sheet. Don't reduce the temperature, but start checking the internal temp about 5 minutes earlier. The smaller mass of meat means the oven recovers its heat faster after you open the door.
Cooking for a Crowd (Upscaling) When doubling the recipe to 4 lbs of chicken, do NOT crowd the pan. If the thighs are touching, they'll steam each other, and you'll lose the crispiness. Work in batches or use two separate baking sheets.
Important Scaling Note: Do not double the salt and baking powder linearly if you are making a massive batch (like 10 lbs). I find that 1.5x the seasoning is usually enough for 2x the meat. Too much baking powder can leave a slightly soapy taste on the skin.
| Batch Size | Pan Layout | Temp Adjustment | Time Adjustment |
|---|---|---|---|
| Single (2) | Small tray | None | -5 mins |
| Standard (6) | Large tray | None | Baseline |
| Large (12+) | 2 Large trays | Lower 25°F | +10 mins |
Kitchen Truths and Myths
There's a lot of bad advice out there about roasting chicken. Let's clear a few things up.
Myth: Searing first "seals in" the juices. This is the biggest lie in cooking. Searing creates flavor and color, but it doesn't create a waterproof barrier. The juices leave the meat regardless of whether you sear it first.
The wire rack method gives you the same color without the messy stovetop splatter.
Myth: You must leave chicken at room temperature before baking. While this is great for a thick steak, it's less critical for chicken thighs. In fact, keeping the chicken cold can actually help the skin stay firm while the fat renders, leading to a better crunch.
Myth: Higher temps always mean drier meat. Not with thighs. Because thighs have more connective tissue and fat than breasts, they actually benefit from high heat. The fat renders out, effectively "frying" the meat from the inside.
Storage and Leftover Tips
If you have leftovers, you're in luck, but you've got a challenge: maintaining that crunch.
Fridge Storage Store the chicken in an airtight container for up to 4 days. Keep them in a single layer so they don't crush each other.
Freezing You can freeze cooked thighs for up to 3 months. Wrap them tightly in foil and then place them in a freezer bag. However, the skin will lose its shatter crisp quality during the freezing process.
The "Crunch Restore" Reheating Method Never, ever microwave your leftover Crispy Baked Chicken Thighs. The microwave turns the skin into rubber. Instead, put them back in the oven or an air fryer at 400°F for about 5-8 minutes.
This re renders the fat and brings back the crackle.
Zero Waste Tips Don't toss the bones if you've used a bone in cut. Throw the remaining bones into a pot with some onion scraps, carrot peels, and celery ends. Simmer them for a few hours to make a rich, homemade chicken stock.
Also, any leftover skin that falls off during carving can be chopped up and fried in a pan to make "chicken cracklings" for a salad topper.
Serving Your Chicken Right
To keep the skin crispy, don't smother the chicken in a heavy sauce. If you love sauce, serve it on the side or drizzle it sparingly over the meat, avoiding the skin.
The Nutrient Dense Plate Balance the richness of the thighs with something bright. A crisp arugula salad with lemon vinaigrette or steamed broccoli cuts through the fat perfectly.
The Comfort Classic For a full on Sunday dinner feel, serve these over a bed of mashed potatoes with a side of honey glazed carrots. The contrast between the velvety potatoes and the shattering skin is a winner.
Final Pro Tip Let the chicken rest. I know it's tempting to dive in the second it hits 165°F, but those 5 minutes of resting allow the proteins to relax. This ensures that when you slice into the meat, the juices stay in the chicken and not on your cutting board.
Trust me, the wait is worth the moisture.
Recipe FAQs
How do you get crispy chicken thighs when baking?
Pat the skin extremely dry with paper towels and use a wire cooling rack. Removing surface moisture prevents the skin from steaming, while the rack allows hot air to circulate underneath the meat.
Is it better to bake chicken thighs at 400 or 425?
Bake at 425°F. Higher heat is essential to render the fat quickly and achieve a shatter crisp skin without overcooking the interior.
How long do you cook baked chicken thighs?
Bake for 30-35 minutes. Use a meat thermometer to verify the thickest part of the thigh has reached 165°F to 175°F.
How to bake chicken thighs in the oven?
Pat thighs dry and coat the skin with avocado oil before seasoning. Place them skin side up on a wire rack over a baking sheet and bake at 425°F for 30-35 minutes.
Can a diabetic eat baked chicken?
Yes, this recipe is diabetic friendly. It relies on lean proteins and basic spices without any added sugars or honey.
Can I eat chicken thighs with IBS?
Yes, although some may need to omit the garlic powder. While the chicken and oil are generally safe, garlic can be a trigger for those with specific IBS sensitivities.
What are some great chicken thigh recipes?
Try pairing these thighs with high heat roasted sides. If you mastered the roasting technique here, apply the same principle to these crispy smashed potatoes.
Crispy Baked Chicken Thighs