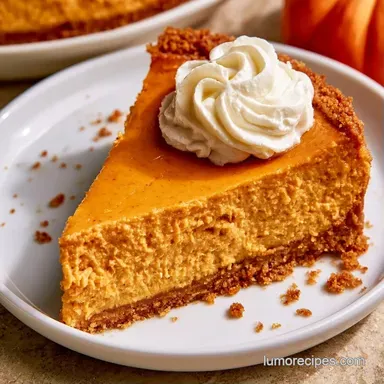
No Bake Pumpkin Spice Cheesecake: Lighter Version
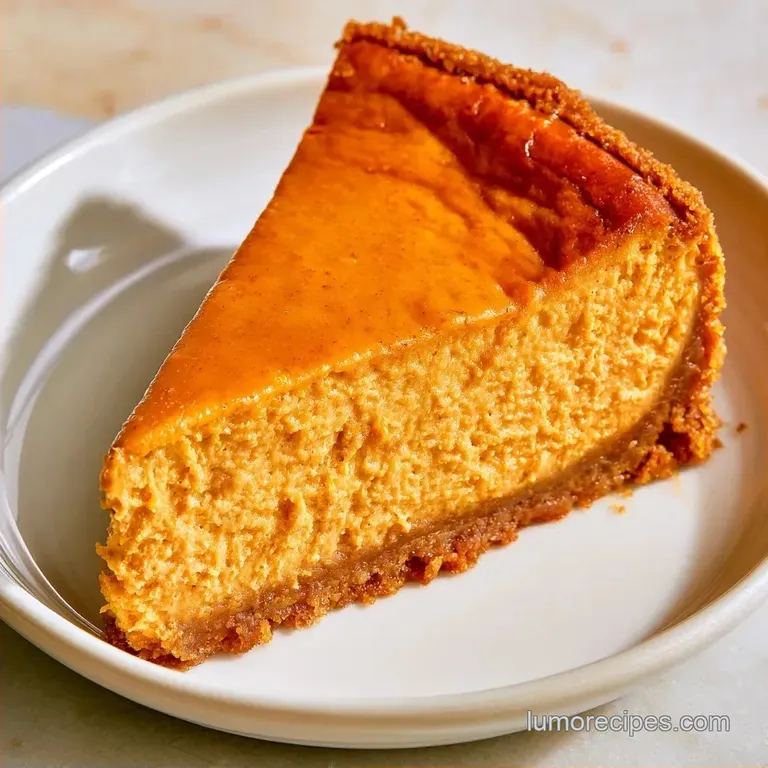
- Time: 20 min active + 6 hours chilling
- Flavor/Texture Hook: Airy, spice forward filling with a salty sweet crunch
- Perfect for: Autumn potlucks or a low effort holiday dessert
The smell of cinnamon and toasted graham crackers always hits me before the cake even leaves the fridge. I remember one November where my kitchen was already at a boiling point from roasting turkeys and baking pies, and the last thing I wanted was to turn on the oven for a cheesecake.
I needed something that felt like a cozy autumn hug but didn't add any more heat to the room.
This No Bake Pumpkin Spice Cheesecake is the answer to that problem. It gives you those deep, warm flavors of the season without the stress of a water bath or the heartbreak of a cracked top. You get a light, airy result that feels far more refined than a standard pudding.
You can expect a dessert that tastes like a high end bakery treat but takes almost no effort. It's all about the contrast between the crisp base and the smooth filling. Let's get into how to make it happen.
No Bake Pumpkin Spice Cheesecake
Greek yogurt gives the cake structure without needing an oven. Folding in whipped cream keeps it light so it doesn't feel like a brick.
Quick Recipe Details
Right then, before we start, here is the breakdown of what we're doing. This recipe makes 12 slices and takes about 20 minutes of actual work, though you've got to be patient with the chill time.
| Goal | What to change |
|---|---|
| Tartness | Increase Greek yogurt |
| Denser feel | Use more cream cheese |
| Saltier crust | Add a pinch more salt |
Between the base and the filling, we're aiming for a balance of textures. This isn't a heavy, dense brick of cheese; it's meant to be a bit more cloud like.
The Ingredient Lineup
I prefer using real maple syrup here. It adds a woody depth that white sugar just can't touch.
| Ingredient | Role | If You Don't Have It |
|---|---|---|
| low-fat cream cheese | Base structure | Full fat (richer, denser) |
| Greek yogurt | Tang & stability | Sour cream (slightly less thick) |
| Pumpkin puree | Main flavor | Roasted pumpkin puree (strain well) |
| Heavy cream | Airiness | Coconut cream (for dairy-free) |
Crust Ingredients
- 1.5 cups (150g) low sugar graham cracker crumbs
- 4 tbsp (55g) unsalted butter, melted
- 1 tbsp (12g) brown sugarWhy this? Adds a molasses note to the crunch
- 0.25 tsp (1.5g) salt
Filling Ingredients
- 16 oz (450g) low-fat cream cheese, softenedWhy this? Prevents lumps in the batter
- 0.5 cup (120g) plain non fat Greek yogurt
- 1 cup (245g) canned pumpkin puree
- 0.5 cup (120ml) pure maple syrup
- 1 tbsp (8g) pumpkin pie spice
- 1 tsp (5ml) vanilla extract
- 1 cup (240ml) heavy whipping cream, chilled
Topping Ingredients
- 0.5 cup (120ml) heavy whipping cream, chilled
- 1 tbsp (15ml) maple syrup
- cinnamon for garnish
Substitution Guide
| Original Ingredient | Substitute | Why It Works |
|---|---|---|
| Graham Crumbs | Gingersnap crumbs | Adds a spicy kick; Note: Harder texture |
| Maple Syrup | Honey | Similar sweetness; Note: Floral aroma |
| Pumpkin Pie Spice | Cinnamon + Nutmeg | Basic autumn flavors; Note: Less complex |
Essential Kitchen Tools
While a full suite of equipment isn't required, these items make the process much smoother.
- 9 inch springform pan: This is a must have for a clean, effortless release.
- Electric hand mixer or stand mixer: Beating the cream cheese manually is far more effort than necessary.
- Silicone spatula: Key for folding the cream gently to maintain its airy texture.
- Mixing bowls: One large bowl for the filling and a chilled one for the cream.
Chef's Tip: Place your mixing bowl and beaters in the freezer for 10 minutes before whipping the cream. This helps the fat emulsify more quickly, allowing you to achieve stiffer peaks in less time.
Putting It Together
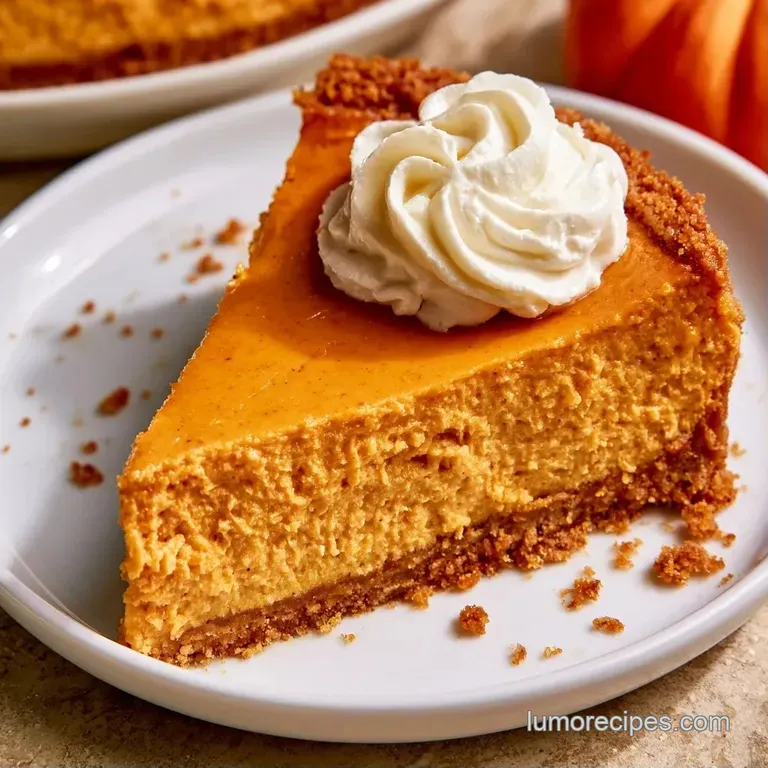
Be precise with these instructions. Take your time with the final "fold," as it is the most critical step.
Phase 1: The Base 1. Combine graham cracker crumbs, melted butter, brown sugar, and salt in a bowl until the texture is like wet sand. 2. Use a flat bottomed glass to pack the crumbs tightly into the springform pan. 3. Freeze the pan for 10 minutes to harden the crust.
Phase 2: The Filling 4. On medium high speed, beat the softened cream cheese and Greek yogurt until the consistency is entirely smooth. Note: Complete this step before adding other ingredients to prevent lumps. 5.
Mix in the pumpkin puree, maple syrup, pumpkin pie spice, and vanilla. Beat on medium until the color is a consistent orange. 6. Whip 1 cup of heavy cream in a separate chilled bowl until stiff peaks form. 7.
Using a silicone spatula, gently fold the whipped cream into the pumpkin base. Use a slow "cut and fold" circular motion until no white streaks remain.
Phase 3: Setting and Finishing 8. Spread the filling over the chilled crust and level the top with a spatula. 9. Refrigerate for 6 hours until the cake feels firm to a light touch. 10.
Beat the remaining 0.5 cup cream and 1 tbsp maple syrup until fluffy, then add dollops to the top and sprinkle with cinnamon.
Fixing Common Issues
It's easy to hit a snag with no bake desserts because you can't rely on heat to set the proteins. Most problems come down to temperature or mixing technique.
Filling is Too Soft
If the cake doesn't hold its shape when sliced, it usually means it didn't chill long enough or the cream cheese was too warm. Don't panic. Just pop it back in the freezer for 45 minutes to firm up the fats.
Lumpy Texture
Lumps happen when the cream cheese isn't fully softened before beating. If you see little white dots, you can carefully pulse the filling in a food processor for 10 seconds, but be careful not to overwork it or the air will vanish.
Crust is Crumbling
A crumbly crust usually means the butter didn't fully coat the crumbs or it wasn't pressed down hard enough. Next time, use a heavy glass to really pack it into the pan.
| Problem | Root Cause | Solution |
|---|---|---|
| Filling is runny | Not enough chill time | Freeze for 45-60 mins |
| Grainy mouthfeel | Cold cream cheese | Beat cheese separately first |
| Soggy base | Too much pumpkin | Press crust firmer; chill longer |
Plating Your Dessert
Because this No Bake Pumpkin Spice Cheesecake is so understated, the presentation makes a huge impact. I usually vary the plating depending on the occasion.
| Level | Visual Style | Quick Tweak |
|---|---|---|
| Simple | Clean slices | Dust with cinnamon |
| Polished | Whipped dollops | Add toasted pepitas |
| Restaurant | Piped swirls | Drizzle maple syrup + mint |
For a high end finish, keep your knife warm and clean between every cut. This helps you achieve the precise, sharp edges typically seen in food photography.
Keeping It Fresh
Store this cake in a sealed container in the chiller for up to 4 days. Avoid leaving it uncovered, as the cream will pick up smells from other foods in the fridge.
If you want to freeze it, you can do so for up to 2 months. I recommend freezing the cake without the whipped cream topping. Thaw it in the fridge overnight before adding fresh cream.
Zero Waste Tip Don't toss the leftover pumpkin puree in the can. Mix it with a bit of cinnamon and honey for a quick oatmeal topper or stir it into a morning smoothie.
Twists and Swaps
If you want to change things up, you can easily pivot this recipe. For those who prefer a more portable treat, these Cheesecake Cups for 8 recipe are a great way to serve individual portions.
Flavor Shifts
- Ginger Twist: Swap the graham crackers for gingersnap crumbs. The heat of the ginger cuts through the creamy filling beautifully.
- Maple Pecan: Press toasted pecans into the crust before chilling for an added layer of crunch.
- Pumpkin Bars: If you prefer a rectangular shape, you can make pumpkin cheesecake bars using a parchment lined baking pan.
Dietary Adaptations - Lower Sugar: Use a monk fruit sweetener instead of maple syrup. The texture remains similar, though the flavor is slightly less complex.
- dairy-free: Substitute the cream cheese with a vegan almond based alternative and use chilled coconut cream instead of heavy whipping cream.
Fresh vs. Canned Comparison
| Ingredient | Canned Puree | Fresh Roasted Pumpkin |
|---|---|---|
| Texture | Smooth and consistent | Can be watery or fibrous |
| Flavor | Standardized | Varies by pumpkin variety |
| Effort | Ready to use | Requires roasting and blending |
This homemade No Bake Pumpkin Spice Cheesecake is a total win for anyone who wants the flavor of autumn without the kitchen stress. It's rich, airy, and genuinely easy to put together.
Just remember to give it those 6 hours in the fridge, and you'll have a dessert that looks and tastes like you spent all day on it.
Recipe FAQs
Can I use pumpkin pie filling instead of puree?
No, stick to pumpkin puree. Pie filling contains added sugars and thickeners that ruin the balance and texture of the filling.
How do I make a cheesecake without baking it?
Beat cream cheese and Greek yogurt together, then fold in whipped heavy cream. The Greek yogurt and chilled cream provide the structural stability needed to firm up in the refrigerator.
Is it true that no-bake cheesecakes never set properly?
No, this is a common misconception. They set firmly as long as you allow them to chill for at least 6 hours to stabilize the fats.
Why is my no-bake cheesecake filling too runny?
It's possible the cream wasn't whipped enough or the ingredients were too warm. Now that you've nailed this texture, you can use a similar approach for this pumpkin cheesecake.
Does this dessert require professional equipment?
No, basic kitchen tools are plenty. You only need a springform pan and a whisk or mixer to achieve a high end result.
No Bake Pumpkin Spice Cheesecake