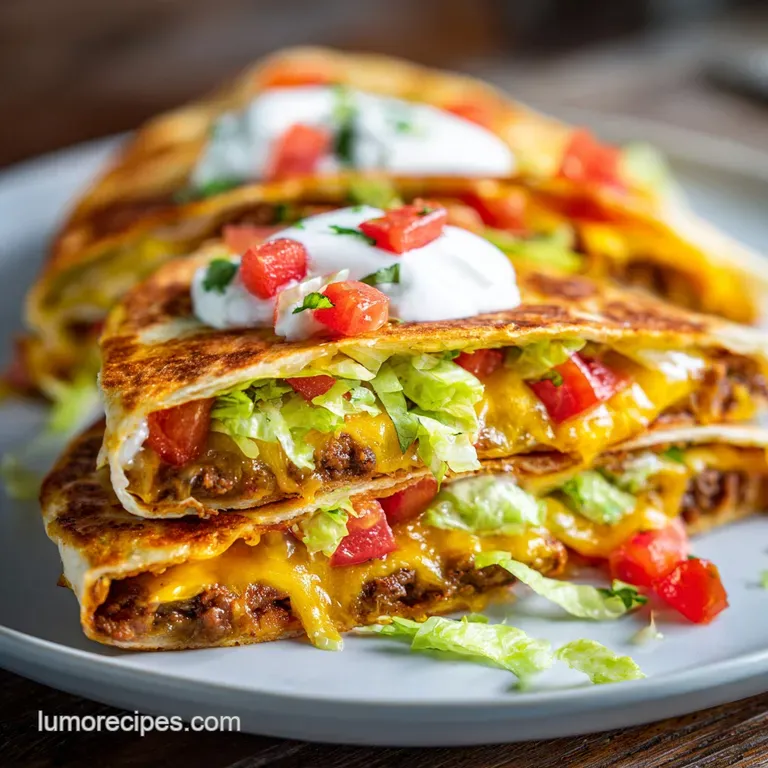
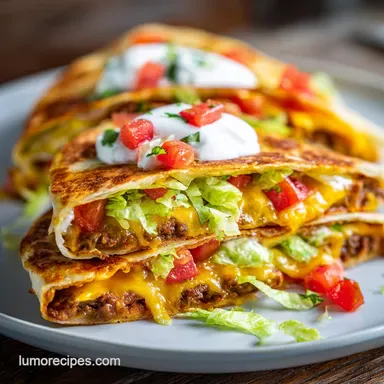
Keto Crunchwraps: Crispy and Low Carb

- Time:10 minutes prep + 10 minutes cook = 20 minutes total
- Flavor/Texture Hook: Savory, spiced beef with a shatter crisp center and velvety cheese
- Perfect for: Quick family dinners or low carb meal prep
- The Ultimate Keto Crunchwraps Recipe 2
- Essential Stats and Cooking Times
- Smart Ingredients for Better Flavor
- Basic Tools for Easy Cleanup
- Mastering the Folding Technique
- Fixing Common Cooking Mistakes
- Tasty Variations for Your Family
- Storage and Meal Prep Secrets
- How to Garnish Your Meal
- Debunking Cooking Myths
- Very High in Sodium
- Recipe FAQs
- 📝 Recipe Card
The Ultimate Keto Crunchwraps Recipe 2
We have all been there. You try to fold a low carb tortilla, and it immediately snaps like a dry twig, sending taco meat and sour cream flying across your kitchen counter. It is frustrating, messy, and honestly makes you want to give up on the whole concept.
Most keto wraps lack the elasticity of flour based ones, which usually leads to a "crunchwrap" that is more of a "crumbwrap." I spent way too many Tuesday nights cleaning up spills before I figured out the specific order of operations that actually works for this lifestyle.
The real trick is managing the moisture. If your tomatoes are too juicy or your beef is swimming in grease, that tortilla is doomed from the start. By using a small "cap" tortilla and searing the pleats first, you create a structural seal that holds up against even the hungriest hands.
This recipe fixes the structural integrity issues while keeping those bold, salty flavors we crave from the drive thru. It is about working smarter, not harder, in the kitchen so you can spend less time scrubbing pans and more time enjoying your dinner.
You are going to love how the keto cheese crisps hold their texture inside. Unlike traditional corn shells that can get chewy when they touch sour cream, these parmesan based or cheddar based crisps provide a distinct, salty shatter that lasts until the very last bite.
This is the fix for the soggy crust problem that plagues most homemade attempts. Let's get into the details of how to make this work every single time without the stress.
Essential Stats and Cooking Times
Knowing exactly how long each phase takes helps you keep the rhythm in a busy kitchen. Since we are dealing with ground meat and delicate wraps, timing is everything to prevent the beef from drying out while waiting for you to finish folding.
The Cheese Weld: Using melted cheese between the top tortilla and the folded edges acts as a culinary glue. As the cheese cools slightly after searing, it hardens to lock the hexagonal shape in place permanently.
Moisture Barrier: Placing the dry beef and cheese crisps directly against the bottom tortilla protects it from the wet ingredients like tomatoes and lettuce. This prevents the outer shell from turning into mush before it hits the pan.
Steam Release: Searing the wrap seam side down first allows internal steam to escape through the tiny gaps in the pleats rather than bloating the tortilla. This ensures the exterior stays crispy rather than becoming gummy.
| Method | Time | Texture | Best For |
|---|---|---|---|
| Stovetop Skillet | 10 minutes | Maximum crunch, golden brown | Quick weeknight dinners |
| Oven Baked | 15 minutes | Even browning, less active | Large batch cooking |
| Air Fryer | 8 minutes | Ultra shatter crust | Single servings |
Choosing the stovetop method is usually my go to because you have total control over the sear. It allows you to feel the weight of the wrap and ensure that the "cheese weld" has fully activated before you flip it.
If you are cooking for a crowd, the oven is fine, but you might lose a little of that direct heat sizzle that makes the tortilla edges so savory.
Smart Ingredients for Better Flavor
The components you choose will determine if this feels like a compromise or a celebration. Since we are keeping things low carb, we rely on high-quality fats and spices to do the heavy lifting for our taste buds.
| Ingredient | Science Role | Pro Secret |
|---|---|---|
| 90/10 Ground Beef | Protein structure | Brown it until deeply caramelized for umami |
| Keto Cheese Sauce | Emulsified fat | Warm it slightly so it spreads evenly |
| Keto Tortillas | Structural base | Microwave for 10 seconds to increase flexibility |
Using a lean ground beef is actually quite important here. While we love fats on keto, too much rendered grease will soak into the tortilla and cause it to fail structurally. If you use a fattier blend, you must be very diligent about draining it well before adding your water and seasoning.
For the base, you will need 4 large keto tortillas (10-12 inches) and 4 small keto tortillas (4-5 inches). The small one is the "bridge" that allows the large one to fold over without leaving a massive hole in the middle.
You'll also need 1 lb lean ground beef, 2 tbsp sugar-free keto taco seasoning, 1/4 cup water, and 1/2 tsp smoked paprika.
For the crunch and filling, grab 1 cup keto cheese crisps, 1/2 cup sugar-free nacho cheese sauce, 1 cup shredded sharp cheddar, 1/2 cup full fat sour cream, 1 cup shredded iceberg lettuce, and 1/2 cup diced Roma tomatoes. If you find yourself wanting a different protein, this beef mix is almost as easy to prep as the filling for my Healthy Chicken Salad Wrap.
| Original Ingredient | Substitute | Why It Works |
|---|---|---|
| Ground Beef (1 lb) | Ground Turkey (1 lb) | Lower calorie but requires more seasoning for depth |
| Cheese Crisps | Pork Rinds (crushed) | Provides the same crunch with zero carbs |
| Nacho Cheese | Spicy Mayo | Adds creaminess and heat without the dairy heaviness |
When swapping ingredients, keep the moisture level in mind. If you use spicy mayo instead of nacho cheese, it may be thinner, so use a little less to keep the wrap from sliding around during the folding process.
Basic Tools for Easy Cleanup
You do not need a professional kitchen to pull this off, which is the beauty of this keto crunchwraps recipe 2. A simple non stick skillet is your best friend here. It ensures that the tortilla doesn't stick when you go to flip it, which is the most common way these wraps fall apart.
Chef Tip: Use a heavy cast iron press or even just a heavy lid to weigh down the crunchwrap while it sears. This ensures the entire surface area makes contact with the heat for an even, golden finish.
You will also need a sharp knife for dicing the tomatoes and a sturdy spatula. I prefer a wide silicone spatula because it can slide under the entire wrap at once, supporting the pleats so they don't pop open mid air.
For the beef, a simple wooden spoon or meat masher works wonders to get those fine, uniform crumbles that layer so well.
Mastering the Folding Technique
This is the part where most people get nervous, but I promise it is easier than it looks. Just think of it like wrapping a present where you want everything to be tight and secure.
- Brown the beef. In a skillet over medium high heat, cook the 1 lb ground beef until no pink remains. Drain every bit of excess fat you can.
- Season the meat. Stir in the 2 tbsp taco seasoning, 1/2 tsp smoked paprika, and 1/4 cup water. Simmer for 3 minutes until the liquid reduces into a thick, concentrated glaze. Note: This prevents the meat from being "soupy" and ruining the tortilla.
- Prep the base. Lay a large 10 inch keto tortilla on a flat surface. Spread 2 tablespoons of nacho cheese sauce in the very center, leaving a wide border.
- Layer the protein. Top the cheese sauce with 1/4 of the savory beef mixture.
- Add the crunch. Place 1/4 cup of keto cheese crisps directly on top of the beef. Note: This creates the essential texture contrast.
- Stack the cold layers. Follow the crisps with a dollop of sour cream, a handful of shredded lettuce, and a sprinkle of diced tomatoes.
- The Cap Step. Place a small 4 inch keto tortilla directly over the tomatoes. This acts as the lid that the large tortilla will grab onto.
- Fold the pleats. Fold the edges of the large tortilla toward the center over the small tortilla in a hexagonal pattern.
- The First Sear. Heat a clean non stick skillet over medium low heat. Place the wrap seam side down and sear for 2-3 minutes. Wait until you hear a light sizzling sound and the edges look toasted.
- Final Flip. Carefully flip and cook for another 2-3 minutes until golden and the cheese has melted to seal the wrap.
The "cheese weld" happens in step 10. The residual heat from the beef and the pan melts the shredded cheddar and nacho cheese together, effectively gluing the pleats to the small tortilla cap. It creates a velvety texture that contrasts beautifully with the crispy exterior, much like the richness found in a Creamy Garlic Parmesan Pasta.
Fixing Common Cooking Mistakes
Even with the best instructions, things can go sideways. The most common issue is the "blowout," where the filling escapes through the side. This usually happens because the wrap was overstuffed or the heat was too high, causing the tortilla to stiffen before it could seal.
Why Your Wrap Opens Up
If the pleats keep popping open the second you let go, your tortilla is likely too cold and stiff. Keto tortillas often rely on fiber and gluten substitutes that are only pliable when warm. Give them a quick 10 second zap in the microwave between damp paper towels before you start folding.
This makes them act more like a traditional flour tortilla.
Why Your Wrap Is Soggy
The culprit is almost always the tomatoes or the lettuce. If you dice your tomatoes and put them in a bowl, you will see a pool of water at the bottom after five minutes. Drain that! Better yet, deseed the tomatoes before dicing. Also, make sure your lettuce is bone dry after washing.
Even a few drops of water can turn your crunch into a sponge.
| Problem | Root Cause | Solution |
|---|---|---|
| Tortilla cracks | Low moisture in wrap | Microwave with damp paper towel for 10 seconds |
| Center is cold | Sear was too fast | Use medium low heat to allow heat to penetrate |
| Filling falls out | Overstuffing | Reduce meat to 1/4 lb per wrap; leave 2 inch border |
Checking your progress as you go is vital. If you notice the tortilla is browning too fast but the cheese inside hasn't melted, turn the heat down immediately. You want a slow, steady toast, not a flash fry.
- ✓ Always drain the beef thoroughly to prevent grease soaked tortillas.
- ✓ Pat your diced tomatoes dry with a paper towel before adding them to the wrap.
- ✓ Preheat the skillet for at least 2 minutes so the seal happens instantly.
- ✓ Keep the heat at medium low; high heat will burn the tortilla before the inside is hot.
- ✓ Use a "weight" (like a small plate) on top of the wrap while searing the seam.
Tasty Variations for Your Family
Once you have mastered the basic beef version, you can start getting creative. This formula works with almost any protein as long as you keep the moisture controlled.
Keto Shredded Chicken Recipe Variation
If you have leftover rotisserie chicken, shred it and toss it with the same taco seasoning and a little lime juice. It is a leaner option that still feels incredibly indulgent when paired with the nacho cheese sauce. It is a great way to use up meal prepped chicken from earlier in the week.
The Spicy Jalapeño Kick
For those who like a bit of sweat with their meal, add sliced pickled jalapeños right on top of the beef layer. The vinegar in the pickles cuts through the richness of the cheese perfectly. You can also swap the cheddar for pepper jack cheese to get that slow burn heat throughout the entire wrap.
If you are looking for a totally different flavor profile, you could even go with a Mediterranean vibe use ground lamb, feta cheese, and a cucumber yogurt sauce (just watch the carb count on the yogurt). The technique remains exactly the same; only the flavor profile shifts.
Storage and Meal Prep Secrets
This is one of those dishes that is truly best eaten fresh, but you can definitely prep the components ahead of time to make your busy weeknights even smoother.
Storage: Store the cooked beef mixture in an airtight container in the fridge for up to 4 days. Keep the diced tomatoes and shredded lettuce in separate containers to maintain their freshness.
I do not recommend storing fully assembled crunchwraps in the fridge, as the lettuce will wilt and the "crunch" layer will lose its texture.
Freezing: You can freeze the seasoned beef for up to 3 months. To reheat, just thaw it overnight in the fridge and give it a quick toss in a hot skillet with a splash of water to loosen the glaze back up.
Zero Waste: If you have leftover tortilla scraps from trimming or broken cheese crisps, don't toss them! Toss them in a little oil and taco seasoning and bake them until they are extra crispy. They make fantastic "croutons" for a taco salad the next day.
You can also use the leftover beef in an omelet for a high protein breakfast.
How to Garnish Your Meal
The presentation is what takes this from a "quick fix" to a meal that feels special. When you slice into the wrap, use a very sharp serrated knife. This allows you to saw through the crispy tortilla and the cheese crisps without squashing the delicate layers of lettuce and tomato inside.
I love serving these with a side of extra sour cream and a chunky salsa. If you want to get fancy, a few sprigs of fresh cilantro and a squeeze of lime juice right before serving adds a brightness that balances the heavy, savory notes of the beef and cheese.
The "residual heat factor" is real here. Let the wraps sit for just 60 seconds after taking them out of the pan. This allows the internal cheese to set slightly so the whole thing doesn't slide apart when you take your first bite. It is a small test of patience that pays off in a much cleaner eating experience.
Debunking Cooking Myths
One common myth is that you need a specialized "tortilla press" or a sandwich maker to get a good seal. That is simply not true. A flat skillet and a heavy hand (or a heavy lid) are all you need. The "press" comes from the weight you apply while the cheese is melting, which creates that flat, iconic shape.
Another misconception is that keto tortillas "won't brown" because they lack traditional sugars. While they might take a minute longer than a flour tortilla, they will absolutely brown and crisp up thanks to the proteins and fibers in the wrap. You just have to be patient and avoid the temptation to keep flipping it.
One flip is all you need for a professional looking result.
Finally, people think the cheese crisps will melt into a blob. Most keto cheese crisps are baked long enough that they have a higher melting point than shredded cheese. They will soften slightly, but they maintain enough structural integrity to provide that necessary "snap" that makes a crunchwrap a crunchwrap.
Enjoy the process and the results!

Very High in Sodium
1180 mg 1180 mg of sodium per serving (51% 51% of daily value)
The American Heart Association recommends limiting sodium intake to less than 2,300mg per day, with an ideal limit of less than 1,500mg for most adults.
Tips to Reduce Sodium
-
Lower Sodium Cheese Crisps-25%
Opt for naturally lower sodium cheese crisps or make your own using low-sodium cheese like provolone or a blend with a smaller amount of sharp cheddar. This can significantly reduce overall sodium.
-
Reduced Sodium Sharp Cheddar-15%
Choose shredded sharp cheddar cheese labeled 'reduced sodium' or 'low sodium'. Compare labels to find the option with the lowest sodium content per serving.
-
Smart Nacho Cheese Sauce-20%
Look for a sugar-free nacho cheese sauce specifically marketed as low sodium. Alternatively, consider making a homemade version with unsalted butter and low-sodium cheese.
-
Homemade Taco Seasoning-30%
Prepare your own taco seasoning using salt free chili powder, cumin, paprika, garlic powder, onion powder, and oregano. This gives you complete control over sodium levels.
-
Enhance with Fresh Herbs & Spices
Boost flavor by adding fresh cilantro, lime juice, and a pinch of red pepper flakes. These ingredients add zest without adding sodium.
-
Control Tortilla Sodium-10%
Check the nutrition labels of your keto tortillas. Some brands can contribute a surprising amount of sodium. Look for brands with lower sodium content per serving.
Recipe FAQs
Can I store assembled crunchwraps in the refrigerator?
No, avoid assembling ahead of time. The lettuce will wilt and the keto cheese crisps will lose their texture, resulting in a soggy wrap instead of a crunchy one.
How to keep the filling from falling out during folding?
Use the small tortilla as a structural barrier. Place it directly over the toppings to provide a flat surface that anchors the hexagonal pleats, ensuring the wrap stays sealed while you sear it.
Is it true that I should use high heat to sear the crunchwraps?
No, this is a common misconception. Use medium low heat to ensure the cheese melts and seals the seam without burning the keto tortilla before the center is warm.
How to achieve the perfect golden brown crust?
Sear the seam side down first for 2-3 minutes. This locks the pleats in place, then flip carefully and sear the other side until it reaches a uniform golden color.
Can I prepare the beef mixture in advance for faster assembly?
Yes, store the cooked beef in an airtight container for up to 4 days. Simply reheat the meat before adding it to your tortilla, much like how you might prep ingredients for creamy meal prep staples.
How to prevent the nacho cheese from making the tortilla soggy?
Spread the cheese sauce thinly directly under the beef. Keeping the sauce contained in the center prevents it from soaking into the edges of the tortilla before you have a chance to sear it.
What is the best way to get a thick glaze on the ground beef?
Simmer the beef with the seasoning, paprika, and water for 3 minutes. The water will evaporate, leaving the seasonings to cling tightly to the meat in a rich, flavorful glaze.
Keto Crunchwraps
Ingredients:
Instructions:
Nutrition Facts:
| Calories | 658 calories |
|---|---|
| Protein | 46 g |
| Fat | 39 g |
| Carbs | 21 g |
| Fiber | 11 g |
| Sugar | 3 g |
| Sodium | 1180 mg |
